PAX3 IT IS GOOD, BUT CAN YOU MAKE IT BETTER?
Los cojones del perro
When I bought my PAX3 I really didn’t know what to expect. Every review I’d read rated it as the best thing since, since……anything ever invented by man since the wheel.
I have always tried to dismissed hype. After all, advertising is just propaganda by another name. There are good advertisements and rubbish advertisements. There is great propaganda and bloody awful propaganda.
So, I eyed the contents of my PAX3 box with a great deal of scepticism. Is this really going to better than my PAX2? After all, 250 quid is a lot to spend on a vapouriser.
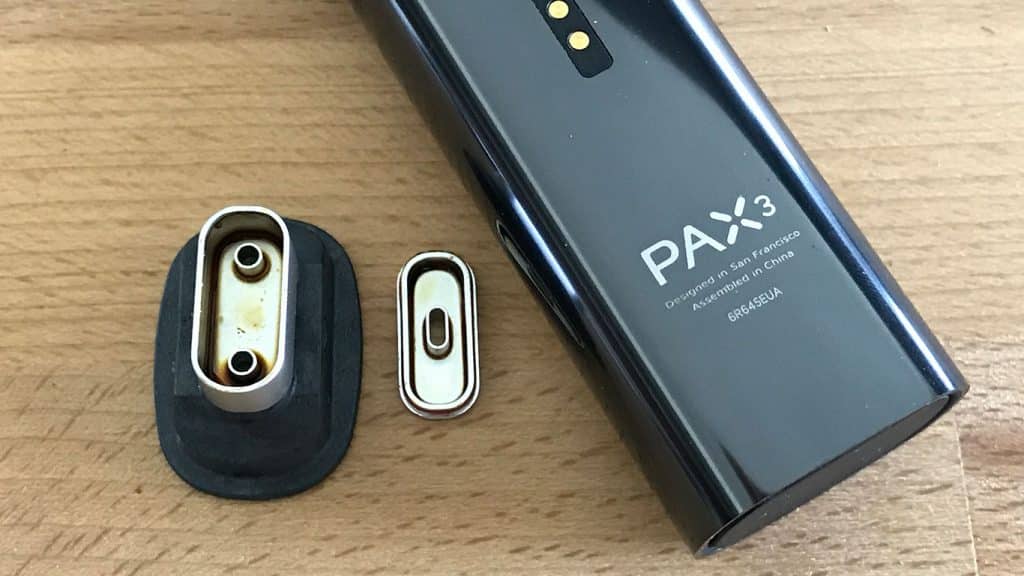
Ah well, in for a penny….And when I did open the box and emptied its contents over my table I was totally puzzled. I have never seen so many bits and pieces all together on one box. This is what I found.
- The battery and heating unit.
- Two mouthpieces (one raised and one flat).
- A base plate (to seal the heating bowl)
- A base plate combined with a half bowl space
- A wax oven which fits on the base plate
- A case
- A magnetic charger
- A manual
First of all I should explain that the PAX3 comes in two versions. I bought the most expensive one, and so far as I know, you don’t get all of the accessories with the base model which costs about £200.
RTFM
As most of my readers know, I usually throw the manual in the bin and immediately start to disassemble the kit inside the box. However, I didn’t do this on this occasion. Two reasons. First, my bin isn’t big enough to hold the manual. Secondly, the contents of the manual were written in plain and simple English. How many times have you bought something made in China and opened the manual to read something like this….
BENCH DRILL
OPERATE INSTRUCTION
PRODUCT INFORMATIC
It is of novel design. Small and exquisite bulk, handy carry. It adopts single phase series motor with high rotable speed. The cent of the product has no class to adjust soon with single kind soon two kinds. The operation please before the manual read……….and so on.
Well, you know how it is. So I was well pleased to be able to make sense of the manual. What´s more, you really should read the PAX3 manual, because to get the best out of a PAX3 you have to make some effort. If you are already the owner of a PAX3, then read on. If you want to read a full review then click here to read Fergus’s review. Then come back later.
A BETTER LIFE THROUGH SCIENCE
You have probably forgotten the difference between conduction and convection heating. There is no reason why you should have had to remember it after leaving school. But, to get the best out of your PAX 3 we are going to take you back in time. Way back. You are a 14 year old kid. Last two periods on a Friday afternoon. You are looking forward to getting home and watching the tele. Trouble is, there`s this old fart banging on about convection and conduction and you can hardly keep your eyes open.
Conduction and convection describe heat transfer. Conduction is motionless, like a hot dry iron. Convection needs liquid or gas to move the energy, like a steam iron, or a steam train.
All I´m going to say about this is that the PAX3 is a conduction vapouriser. That is to say, it heats your tobacco with radiant heat from the hot oven walls. Other Vapourisers heat your tobacco with super heated air and that is convection heating.
Both methods have their plus and minus points, but so far as we are concerned there are only 2 issues that matter.
- Heat up time
- Even temperature throughout the oven.
The heat up time with the PAX3 is fast for a conduction vapouriser, so that’s not a problem.
The variations in temperature inside the oven are miniscule. The PAX3 is outstanding in this regard. The older PAX2 was not so good. Temperature variations were above 5C, meaning you were forever having to stir your tobacco to get a decent vape. It also meant that there were hotspots inside the oven causing some of the tobacco to start combusting, whilst some remained “cold”. The PAX3 has sorted this out. This makes the PAX3 ideal for what follows.
A veces el remedio es peor que la dolencia
However, sometimes the remedy is worse than the ailment. And in the case of the PAX3 the only problem is the size of the oven. It holds 0.3g which is not very much, and although the quantity is small it does produce a good vape, for a short while. So, how can we make it better?
If we could slow down the vapourising process, without affecting the flavour that would be perfect and it can be done. Here´s how.

Bring on the Propylene Glycol PG. If you you use an ecig, or HEETS you are inhaling PG. It’s safe.
Most Vape shops sell PG and 500ml is less than a fiver. PG is used in ecigs and HEETS to replicate the “throat hit” you get when you smoke a normal cigarette.
Vape grade PG is about 80%PG and 20% water. It has a boiling point of about 250˚F or 121˚C .
If you like clouds of vapour, then bring on the Vegetable Glycerin VG which has the same boiling point as PG. Most good vape shops will sell this too, for about the same price as PG.
The only drawback to to VG is that it is used as a sweetener, so I recommend using more PG than VG. If you can’t get your PG / VG from your vape shop, then go to a chemist and get the Pharma grade stuff. Just remember to dilute it with water. Distilled is best.
Important.
Pharma grade PG and VG have a boiling point of 290˚C/554˚F. Such heat will burn all of your tobacco, your vaporiser, your house, you and the entire neighbourhood. And in the present political climate, should you have the misfortune to survive, you can expect to spend the rest of your days at GITMO in Cuba, learning advanced Arabic. So add 20% water.
You might want to increase the nicotine yield in your HnB aerosol. If so, splash out on a bottle of 50%VG 50% nicotine solution.
Oh, finally you will need a pipette or a syringe used for refilling ink cartridges. You can carefully discard the blunt needle.
None of this stuff is expensive and you are only going to be using small quantities anyway.
The Recipe
- Open your 30g pouch of tobacco.
- Extract 30ml of PG using your pipette or syringe.
- Layer the PG evenly across the top of your tobacco.
- Extract 20ml of VG using your pipette or syringe.
- Layer the VG evenly across the top of your tobacco.
- Wait 5 minutes, then finger mix the tobacco, PG and VG together for about 2 minutes.
- If adding nicotine do so in 5ml stages. Wait 5mins then finger mix.
- Wash your hands.
The first thing you will notice is that your tobacco pouch will be bulging at the seams. You are now ready to go. Half fill your bowl with the mixture. Switch on your PAX3, set your temperature and inhale.
Let us know what you think.


